

Playlist
6 Videos
1:25

2:34
4:16
1:36
1:10
3:00
Playlist
6 Videos
1:25
2:34
4:16
1:36
1:10
3:00
Playlist
6 Videos

1:10
1:10
1:28
2:48
4:18
4:18
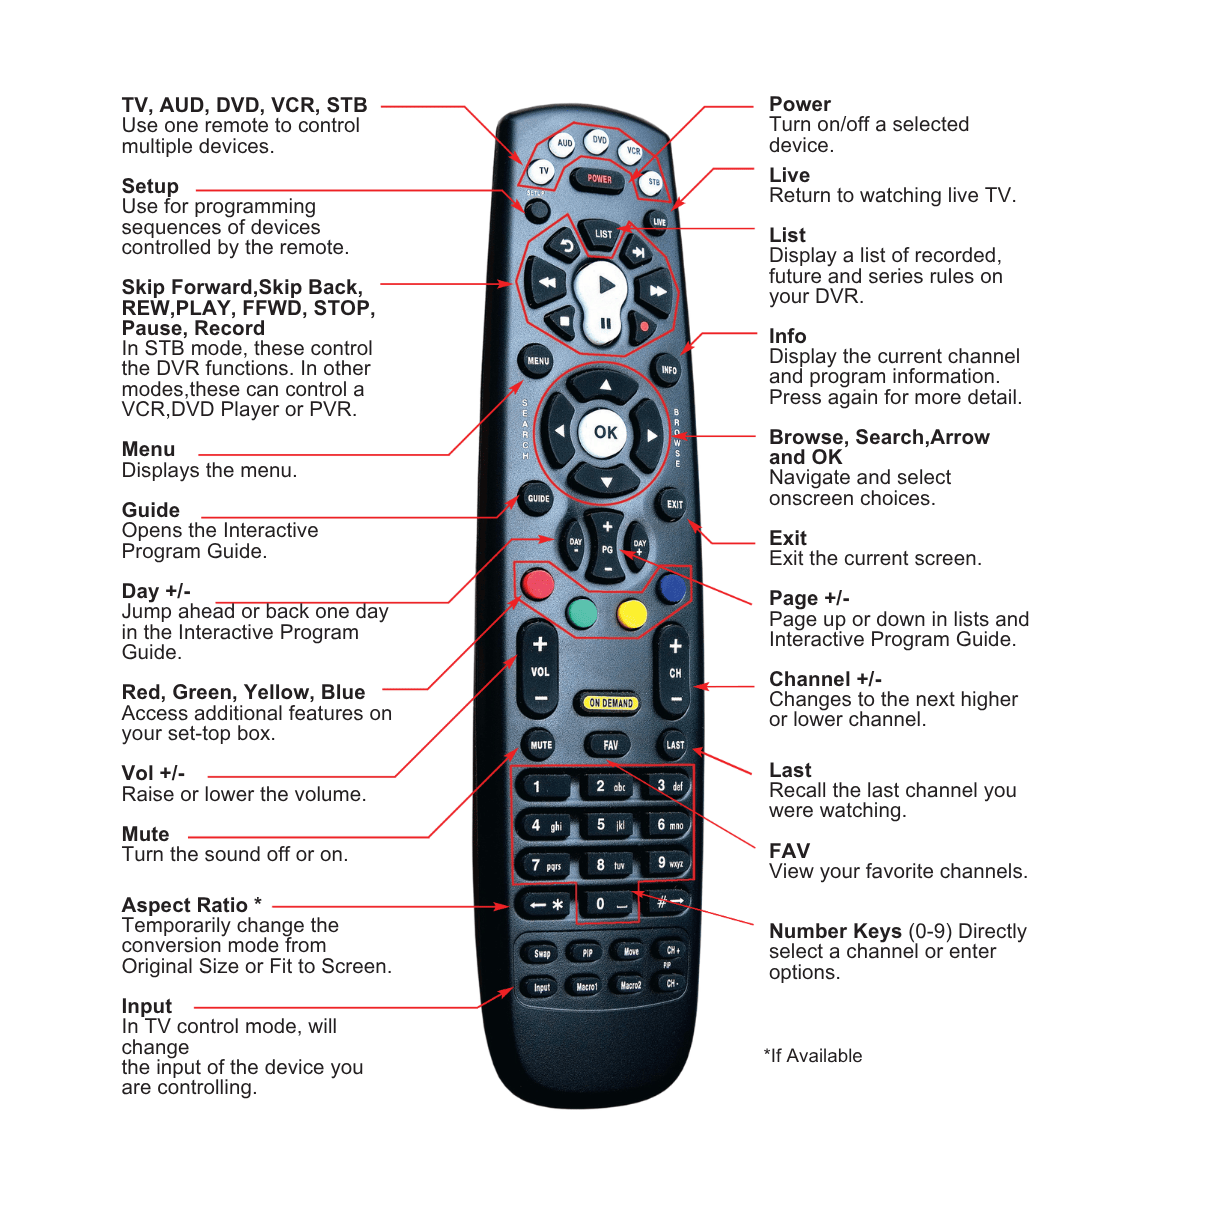
Remote Buttons
Program Your Remote Control to Your TV
Program Your Remote Control to DVD/VCR or Audio
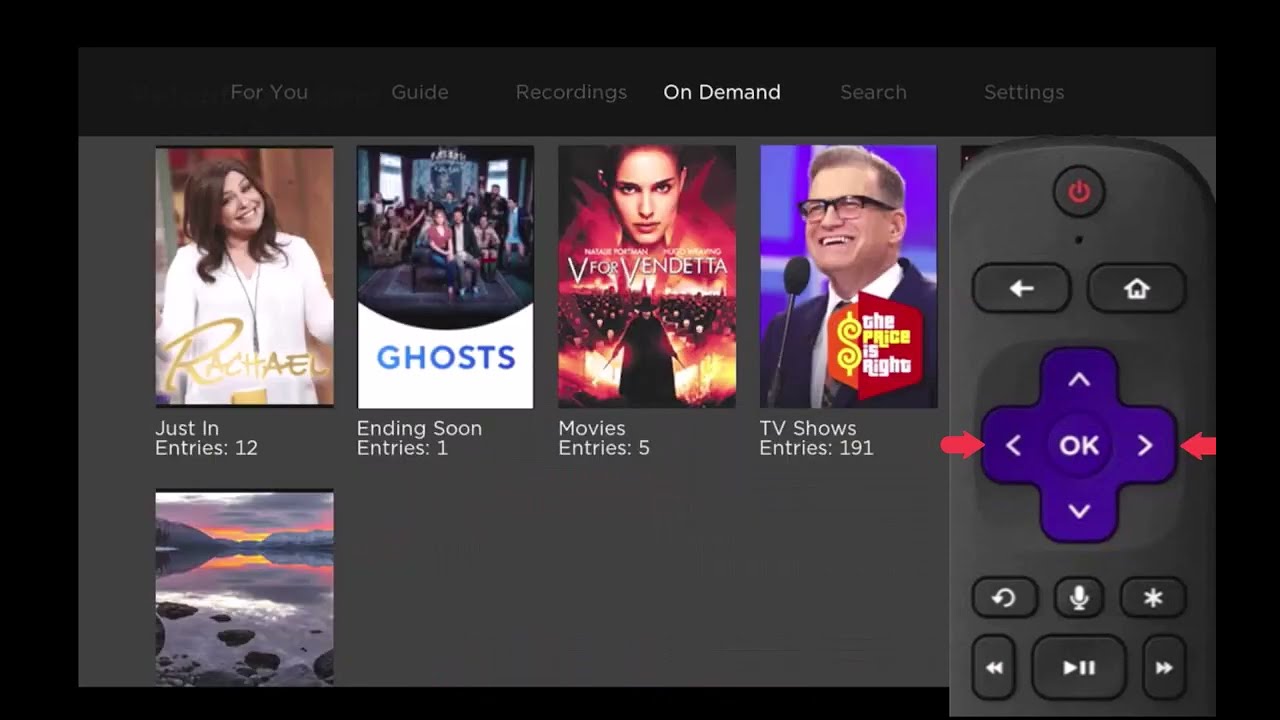
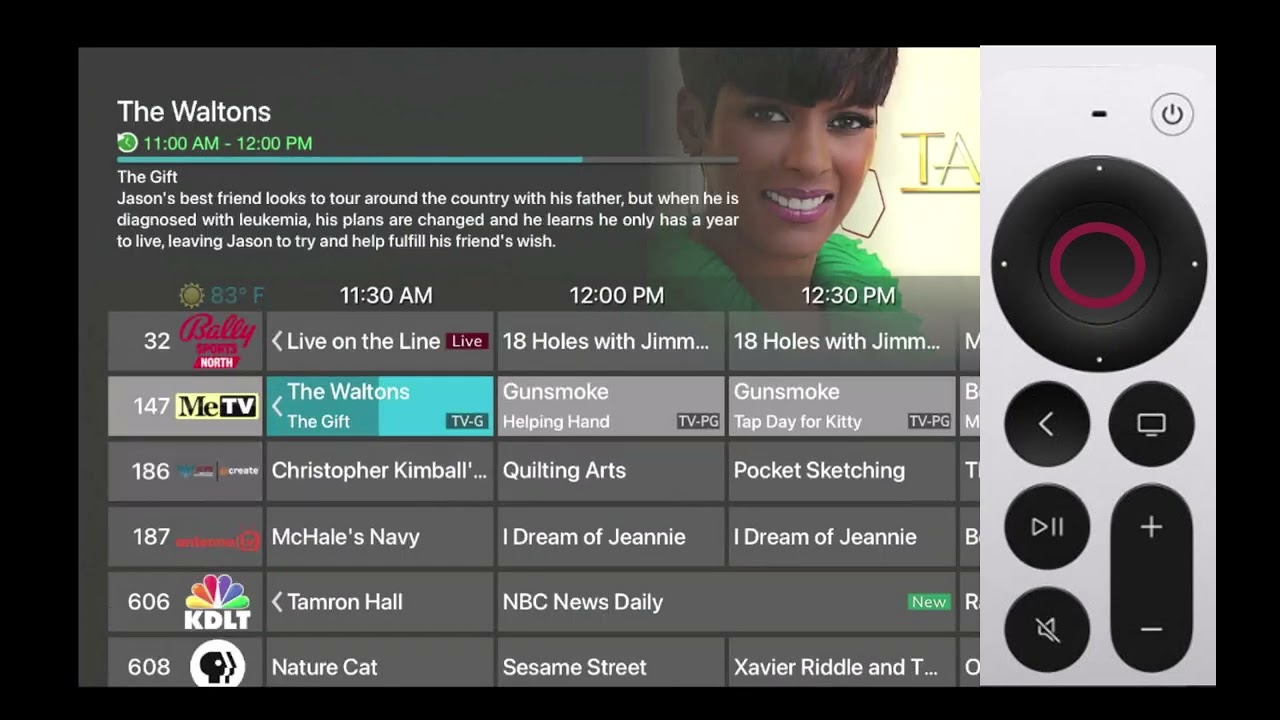
What's on TV?
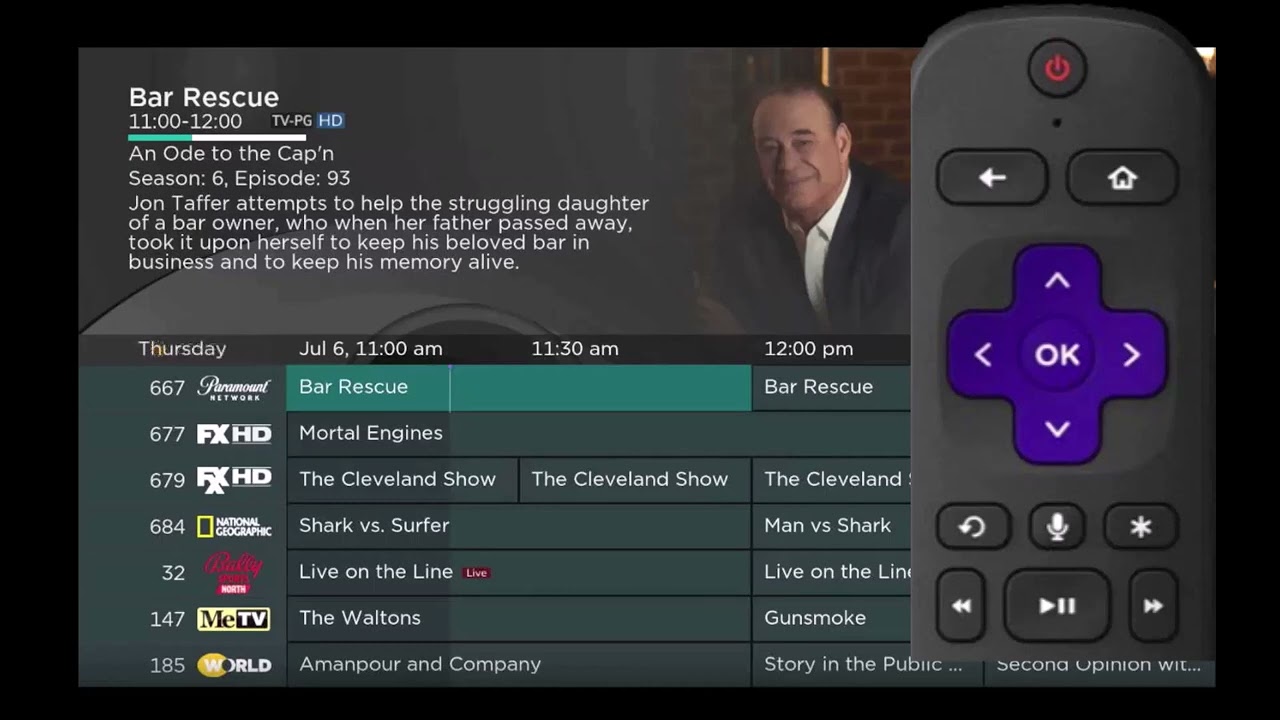
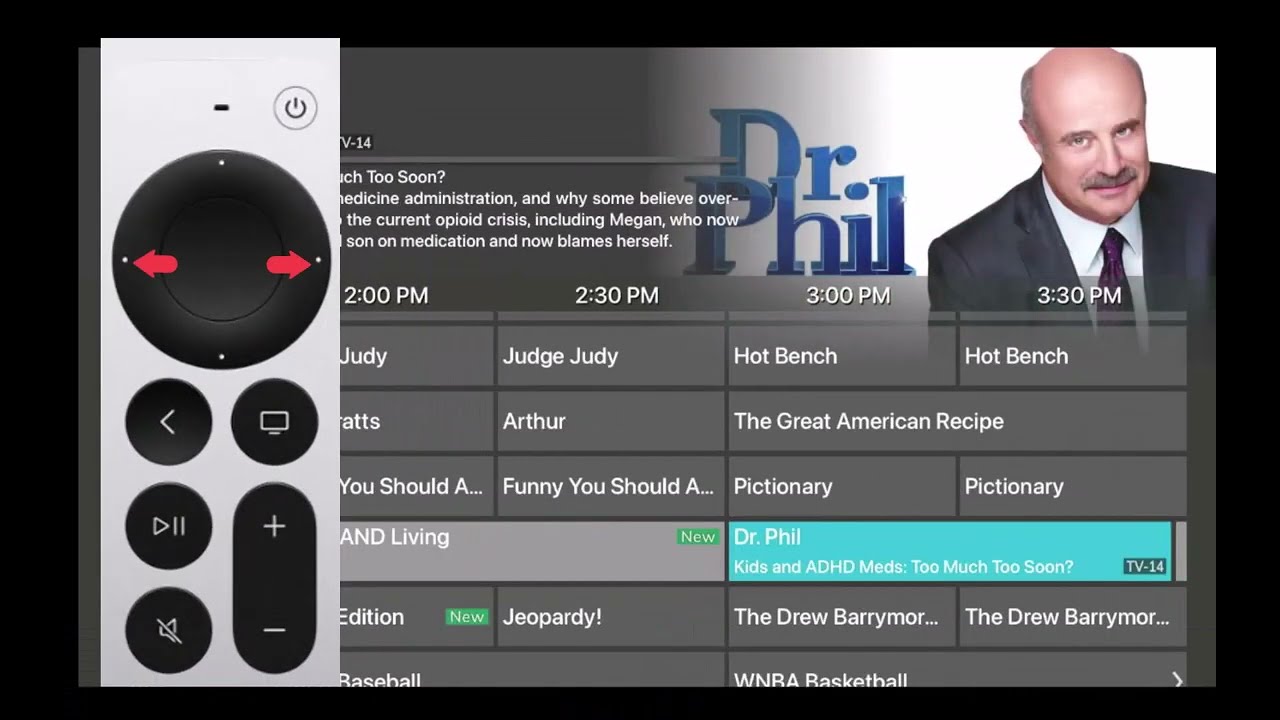
Using the Channel Guide
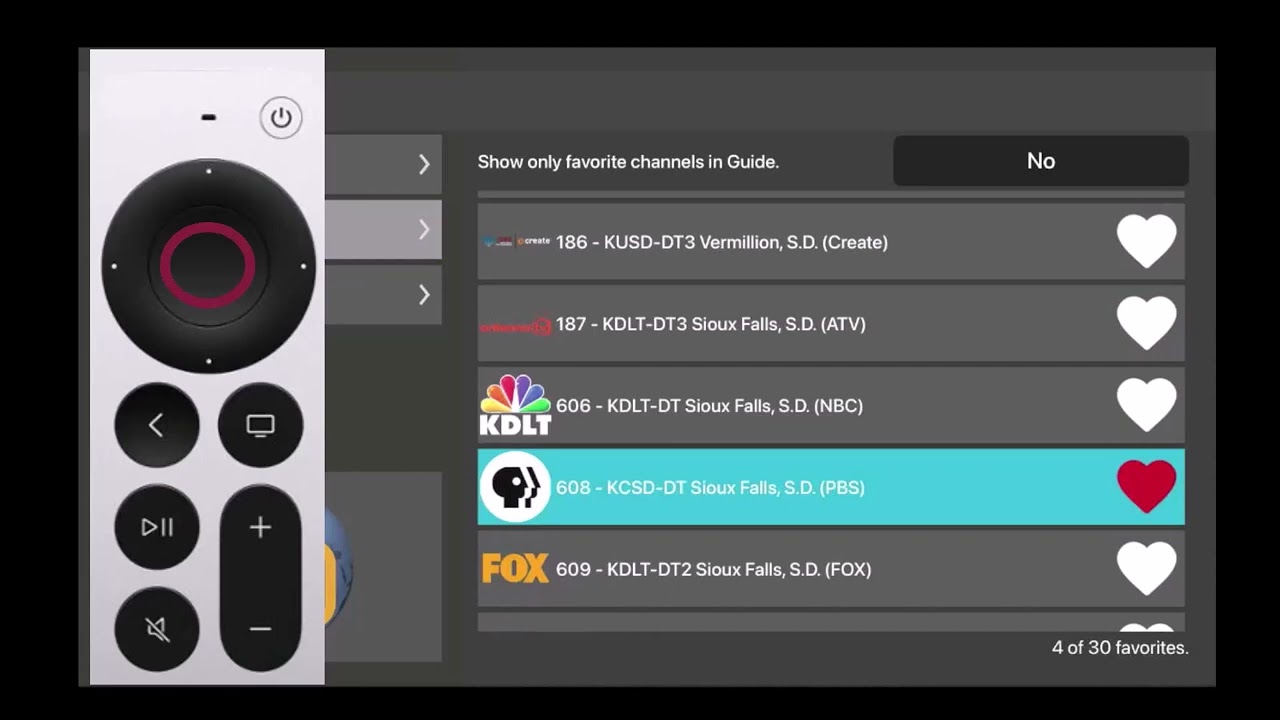
Creating a Favorites List
Search
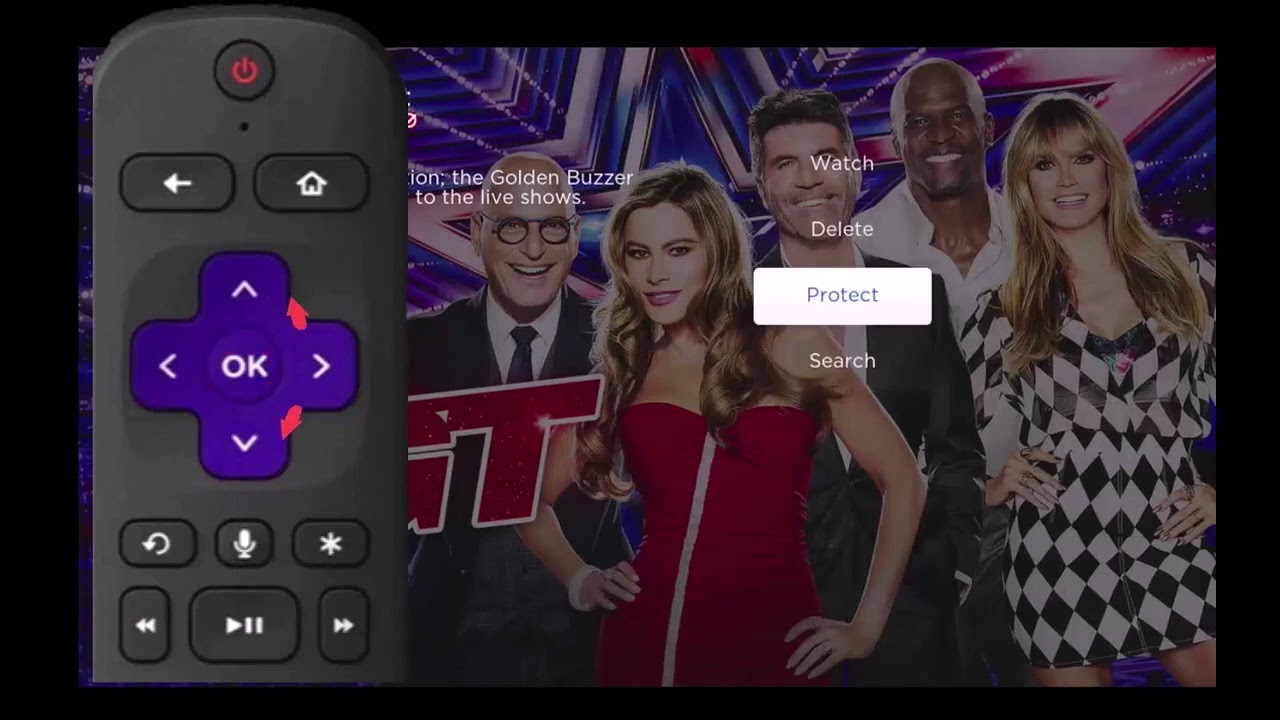
Parental Controls
Attempting to Watch a Locked Channel
Download a Remote Brochure for Print
Traditional Remote Buttons
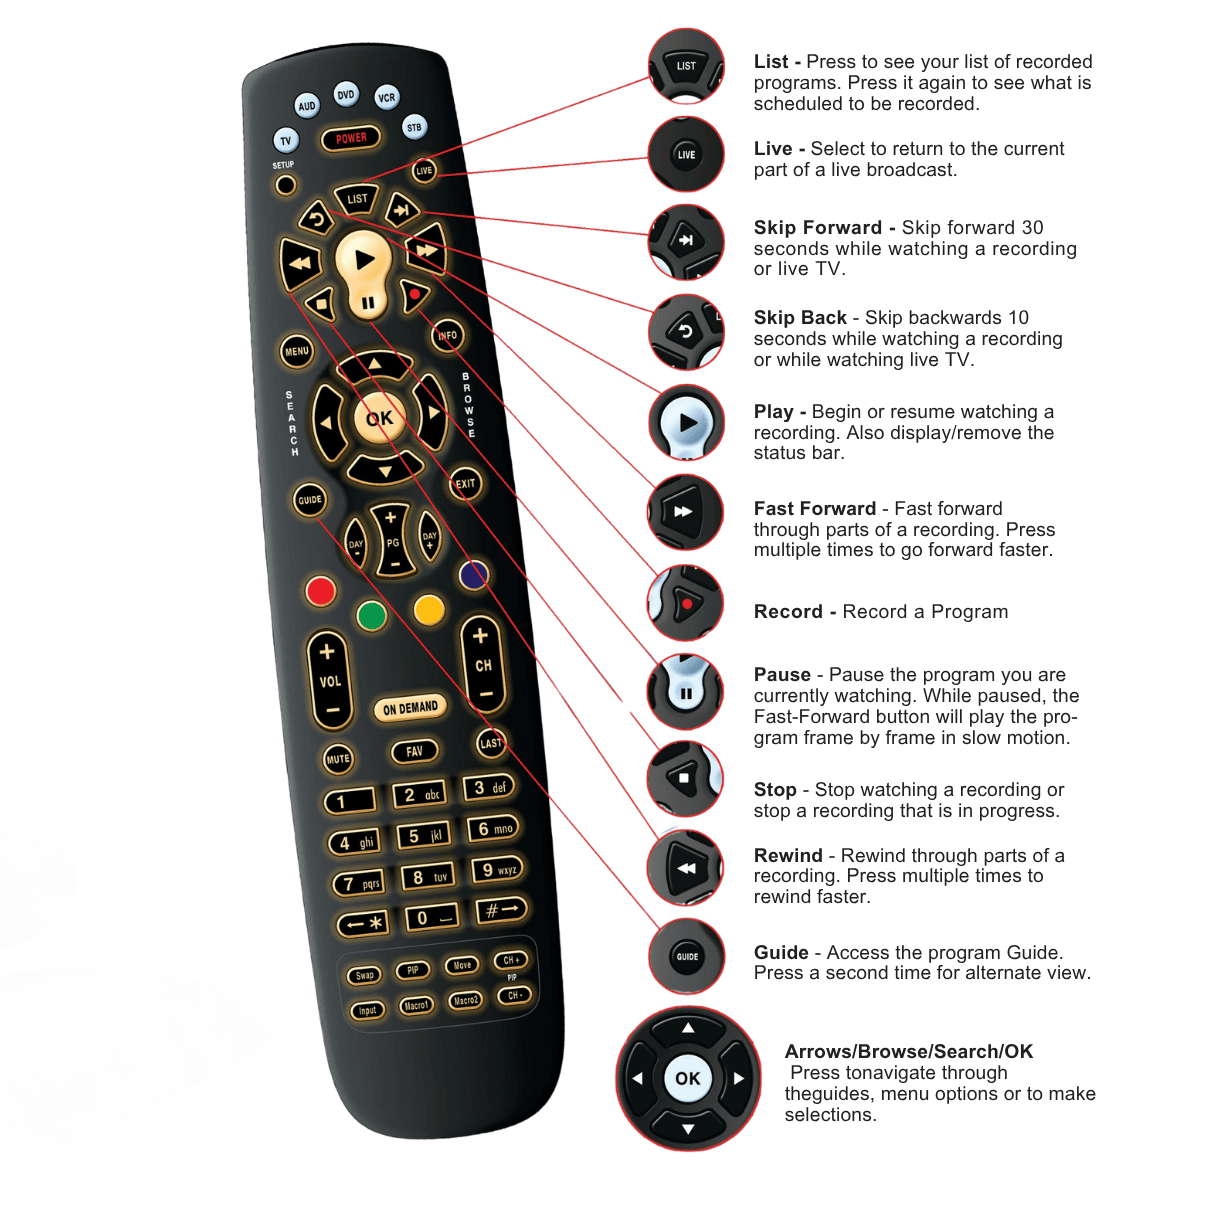
Record What You are Currently Watching
Create a One-Time Recording from the Guide
Record a 'Live' Event (Live sporting event, award show, etc.)
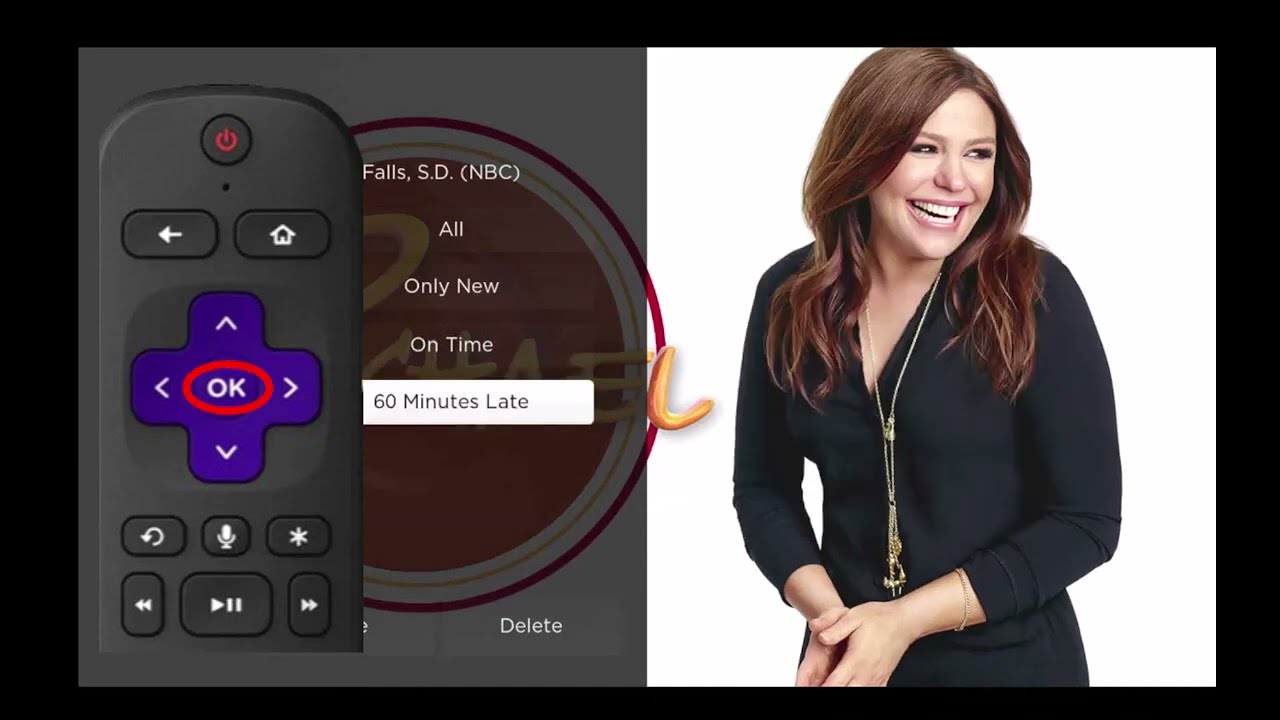
Record a Series from the Guide
Control a Live Program
Watch a Recording
Delete a Recording
Folders
Reminders
Using Bookmarks
Using the LIST Button
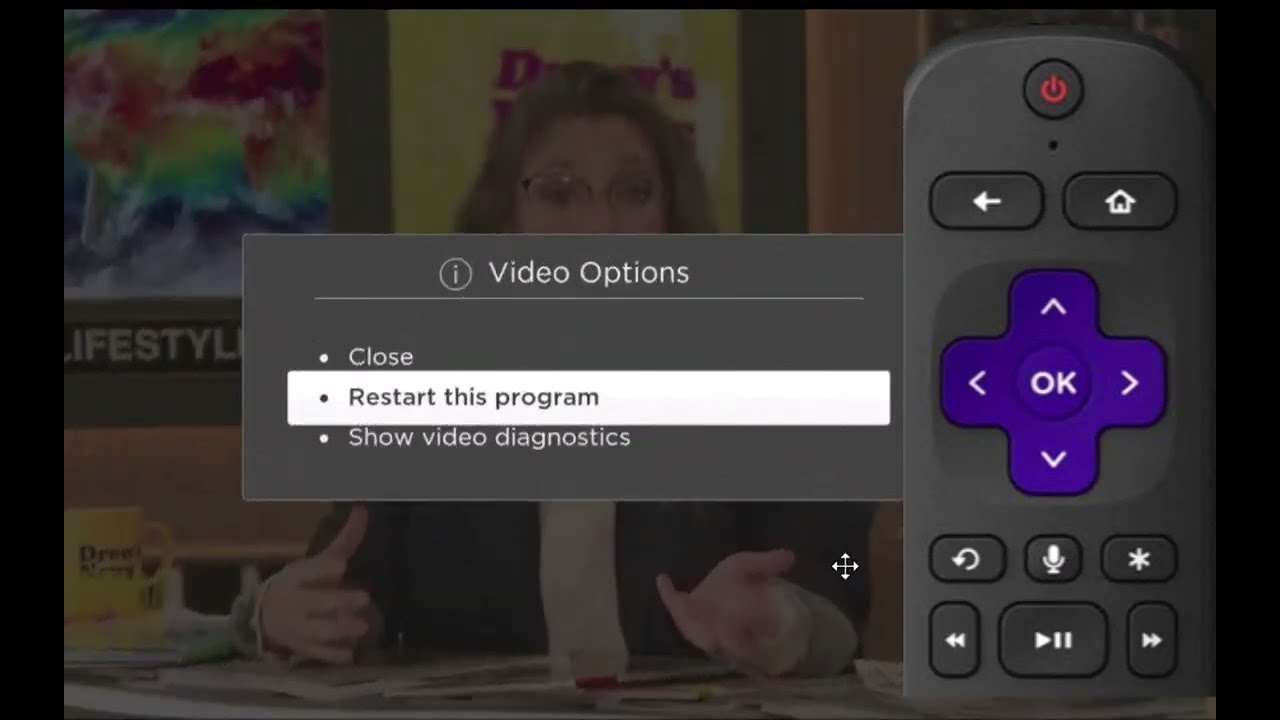
What is Restart TV?
Restart a Program that is Already Airing Using a Traditional Remote
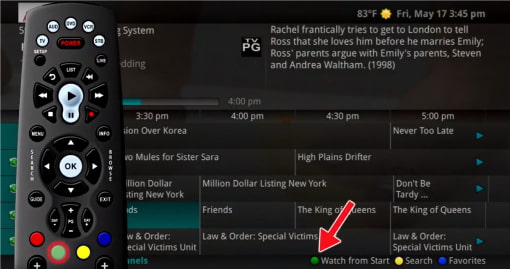
Restart a Program in the Browser Bar Using a Traditional Remote

Recording a Restarted Program Using a Traditional Remote
Restart a Program that is Already Airing Using a Roku Device
Restart a Program that is Already Airing Using an Amazon Fire TV or Apple TV Device
What are Voice Commands?
Using Voice Commands with Google Home
Using Voice Commands with Amazon Echo
Using Voice Commands with MyTVs
- Click on the microphone icon at the top right-hand corner of the MyTVs app.

- This will bring up a Voice Commands screen and show a list of available commands – App Commands, Remote Commands, and Extended Remote Commands.
- Click on the Microphone button and speak the command.
NOTE: You must have Microphone and Speech Recognition activated on your smartphone in the MyTVs App settings